There are some great resources for building extensions to the Open edX platform. The XBlock SDK is excellent, and MFEs offer a great way to build a custom frontend for your Open edX LMS. However, sometimes you need a fully independent application which can communicate to the LMS on behalf of your users. So, today we're going to learn how to Use the Open edX LMS for Authentication.
Initial Setup
For this tutorial we'll be using the traditional Devstack, though it will likely work with a Tutor-based devstack with only minimal modification. We'll be doing the absolute minimum to get the end-to-end experience working, as there are a lot of options on how to customize the larger approach. Note: Everything we'll be doing is OAuth2, not OAuth1, which has been deprecated for quite some time.
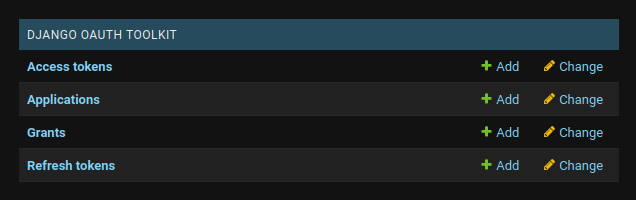
We begin by registering a new application within the LMS. Log into LMS admin panel as the administrator. The default email and password for the admin on the devstack is edx@example.com and edx. From here, find the section with the header 'Django Oauth Toolkit.' Click 'Add' next to 'Applications':
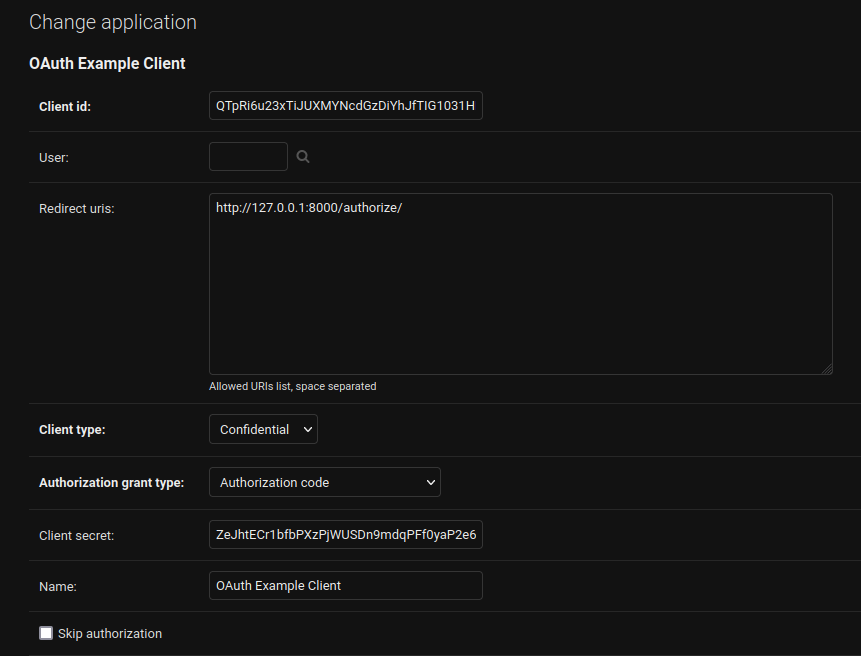
Every tool that needs to log into the LMS and perform actions on behalf of the user using OAuth has to be registered as an application. The form will initially populate with a unique client id and client secret. Save these and put them aside-- we'll need them later!
Leave 'User' blank, and set the Redirect URIs as below-- this will be the address we'll make in our custom tool. Then, set the client type as 'Confidential' and the authorization grant type as 'Authorization Code'. These options are best suited for the kind of application we're creating today-- an independently deployed application that uses the Open edX LMS as an OAuth provider.
Save your changes, and get ready! It's time to make a brand new application.
Creating the Application
We'll be creating our new application in Django. We'll also be using Authlib, a library for authenticating with OAuth providers. We selected Authlib because the amount of code needed to wrap your head around things is quite low. This should be especially helpful if you're trying to learn the principles involved and don't necessarily want to use Django. However, in a real Django-based application, you may want to use something more robust like Python Social Auth instead.
To begin, we install our dependencies and run the startproject django command to create a new Django project:
Further down, at the end of the settings file, we'll add some settings that we'll later import for our OAuth client:
AUTHLIB_OAUTH_CLIENTS = {
    'lms': {
        # Set your own client_id and secret from earlier.
        'client_id': 'client-id-goes-here',
        'client_secret': 'client-secret-goes-here',
        # This is where your application will fetch access tokens from.
        'access_token_url': 'http://localhost:18000/oauth2/access_token',
        'access_token_params': None,
        # This is where your application will redirect the user to
        # authenticate and authorize your application.
        'authorize_url': 'http://localhost:18000/oauth2/authorize/',
        'authorize_params': None,
        # Authlib creates a client object that does a lot of the
        # heavy HTTP request work for you.
        # You specify the root of the API here. Since there are
        # a lot of different API paths in the LMS, we just pick
        # the root of the LMS as the URL.
        'api_base_url': 'http://localhost:18000/',
        # The client can be given some additional customization.
        # One thing we need to specify is the 'scopes' our client
        # will need access to. Here are a few of them. The full
        # list of available scopes can be found in the
        # edx-platform source-code, in lms/envs/common.py
        # within the OAUTH2_PROVIDER setting dictionary.
        'client_kwargs': {
            'scope': 'email profile read',
            # These next two settings specify how the token should
            # be sent in the HTTP requests to authenticate with
            # the LMS.
            'token_endpoint_auth_method': 'client_secret_basic',
            'token_placement': 'header',
        },
    }
}
Now that we have our settings written up, we'll create a file in the profiles directory named oauth, in which we'll set up the OAuth client object.
from authlib.integrations.django_client import OAuth
from django.conf import settings

oauth = OAuth()

for key, value in settings.AUTHLIB_OAUTH_CLIENTS.items():
    # This will register the LMS as a client for Authlib.
    # If you added any other providers to the AUTHLIB_OAUTH_CLIENTS
    # settings dictionary, they'll be added, too.
    oauth.register(key, **value)
Building the Integration to Use the Open edX LMS for Authentication
With that in place, we'll now create some views in profiles/views.py:
from django.shortcuts import render

from profiles.oauth import oauth


def login(request):
    # build a full authorize callback uri
    redirect_uri = request.build_absolute_uri('/authorize/')
    return oauth.lms.authorize_redirect(request, redirect_uri)


def authorize(request):
    # This will create a http request client that points to the LMS.
    lms = oauth.create_client('lms')
    # Here, we authenticate the client with the token we got from the LMS. In a real-world
    # application, we'd save this token somehow for subsequent requests.
    token = lms.authorize_access_token(request)
    # And then, we use this token to fetch the user's info.
    resp = lms.get('/api/user/v1/me', token=token)
    resp.raise_for_status()
    profile = resp.json()
    # Now that we have the user's info, we can render a page with the relevant info.
    return render(request, 'authorize.html', {'profile': profile})
You'll notice we refer to a file named authorize.html. That's our template file we'll need to create. In the profiles directory, create a new directory named templates, and in that directory, create a file named authorize.html with these contents:
You'll notice that this will be a pretty simple page-- it will display the value of profile for you, and that's about it! Now, we need to add the URL routes so Django knows how to access the new views. Replace the contents of profiles/urls.py with:
from django.urls import path

from profiles import views

urlpatterns = [
    path('', views.login, name='index'),
    path('authorize/', views.authorize),
]
And then replace the contents of identifier/urls.py so that it defers to the profile URLs:
from django.contrib import admin
from django.urls import path, include
import profiles.urls

urlpatterns = [
    path('admin/', admin.site.urls),
    path('', include(profiles.urls))
]
Putting it Together
OK! Now we have all the code in place, ready for us to run. Now, we just have to initialize our database and run our application:
./manage.py migrate
./manage.py runserver
The local development webserver should run and display a message like this:
                                                                                                                                 Watching for file changes with StatReloader
Performing system checks...

System check identified no issues (0 silenced).
October 14, 2022 - 19:39:50
Django version 4.1.2, using settings 'identifier.settings'
Starting development server at http://127.0.0.1:8000/
Quit the server with CONTROL-C.
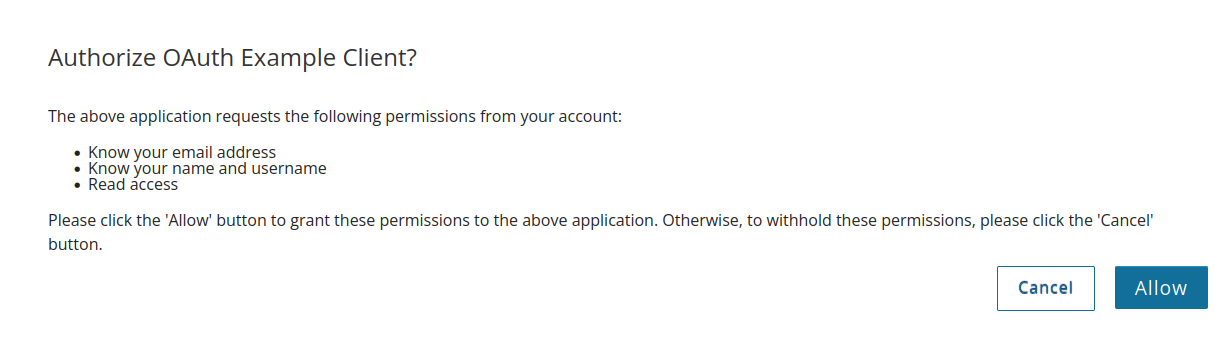
We'll now view that URL-- http://127.0.0.1:8000/, in our web browser. You should be redirected to the LMS. If you're not already logged in, you'll be given a login prompt. Then, you'll get an OAuth authorization screen:
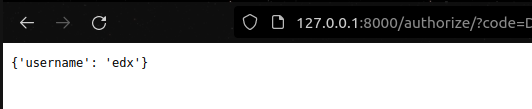
Note that the permissions granted map to the scopes we set in the settings earlier. Go ahead and click 'Allow'. You'll then be redirected to the application:
Success!
Success!
Next Steps
Now that you've built a very basic application using OAuth, you might want to learn how to use Python Social Auth to make a more robust one. You can also take a look at some of the API endpoints available to you. The only limit is your imagination!
By the way, you can grab the full code for this example here, and if you're looking for more help with the Open edX platform, come give us a look!
This year, the Open edX Conference will be held from July 2 – 5, 2024 in Stellenbosch, South Africa. I’m so excited for the community to visit my beautiful country! And what’s more, we have some awesome talks lined up by our very own OpenCrafters. Getting Started with Frontend Pluggability Tuesday 10:00 AM | Braden […]
The arrival of new AI technology has sent the world of online education abuzz. The new technologies have brought new excitement to e-learning, but it’s difficult to tell what’s hype and what’s not. What will the impact of AI be in the online learning space? What’s likely to change? What will remain the same? We’ll […]
Open edX presents Content Tagging! "Tagging" has been a long-requested feature for managing content in Studio, and now OpenCraft is finally designing and building it for Axim Collaborative! While there are big plans, the first release will be a user-friendly, minimal viable product. Here are some of the things everyone can look forward to: So, get ready for more organized learning content. Tagging […]