The Open edX platform is constantly growing in every aspect, something that’s desirable for every Open Source Software that proves to be useful and true to the name. In that sense, the ways of setting up the platform keep evolving, too. Unless you’re knowledgeable with the tools used for working with the platform in a local environment, there is no “simple” way to get started with an instance without help. That’s where we come in.

Setting up any production-ready website requires some configuring, let alone an education platform with so many services, such as E-Commerce, forums, platform-wide annotations, analytics, and more.
Using the OpenCraft Instance Manager (OCIM) allows you to focus on what’s important: creating high-quality courses and increasing the possibilities of online education, based on one of the largest and most scalable Learning Management Systems (LMS).
However, we do have a specific way of setting up the platform for our clients, and like everything related to this massive project, it’s constantly changing for the better. The way we do deployments allows us to offer an easily-manageable installation for anyone who wants to try out what the Open edX platform has to offer. Like any other, our method has both advantages and drawbacks, but we’re constantly evaluating ways to improve it and keep contributing the ideas we come up with to the whole community.
There are two main ways for a developer to deploy the platform:
When we say “various platform services” we’re referring to the various services that are actively supported within Open edX. Nowadays, a DevStack has no trouble setting them up; it will boot containers for each one and keep each environment isolated, making only the necessary connections.

Ideally, scalable software services should be deployed apart from each other to ensure availability, recovery from failures, and ease of escalation and maintenance, among other things. So, the best way to have the Open edX platform running is a distributed native installation— to not put everything into a single machine, but rather set up a server for the database, another for the LMS, another for Insights, and so on.
Distributing a system is costly and requires constant supervision and technical support, and while OpenCraft offers this as part of our hosting plans, it’s necessary to have an option that brings together the security, ease of development, and scalability of having isolated environments like in the DevStack, while providing a production-viable instance of the platform. This is the main purpose of OCIM.
OCIM sets up virtual machines (VMs) that encapsulate a native installation of supported versions of the platform. We do this by using Ansible Playbooks, adapted from those that the Open edX community has worked on, to facilitate our native deployments, and also our own playbooks for monitoring, protecting and managing our client’s instances.
This allows us to offer cost-effective and easy-to-maintain instances, fully isolated from each other, adding an attractive degree of flexibility and security. Additionally, this lets users and administrators customize their instances, leaving upgrades and updates for us to handle, something that’s always recommended if using this platform in a production setting.
Having said that, using VMs does have some limitations worth considering:
While these aren’t game-changing issues for simply testing the plans we offer, we want to reduce the wait time as much as possible for all deployments, so our clients can get faster to the work that matters. For this, we’re considering different ways of provisioning the databases and other assets that are limited by some of our hardware, among other upgrades.
Also, we’re already working on newer OCIM features that will help platform administrators know the status of their instance and easily customize it to the greatest extent, all in one place.
Regardless of your subscription tier, we want to provide you with the most effective tools and the highest level of quality, so you can expand your opportunities in providing the best online education possible. Stay tuned for our upcoming updates! ?
If you’ve had the opportunity to take a course on edx.org, you might wonder how you can contribute to the Open edX platform. The Open edX project is massive – involving many interdependent pieces working together. Deploying the Open edX platform takes a great deal of expertise. However, you can run your own copy for development easily with the “DevStack.” The DevStack sets up all the major components of an Open edX installation and gives you the tools to make your own contributions to Open edX.
Following the DevStack repository’s README results in a working copy of Open edX. Curiously, it creates the repositories not in the DevStack directory, but the one above it:
fox@masamune[~/projects/openedx/devstack] (master)$ ll ../
total 0
drwxr-xr-x 19 fox admin 608 Oct 24 13:33 ./
drwxrwxr-x 28 root admin 896 Oct 24 13:29 ../
drwxr-xr-x 44 fox admin 1408 Oct 24 13:30 course-discovery/
drwxr-xr-x 40 fox admin 1280 Oct 24 13:30 credentials/
drwxr-xr-x 30 fox admin 960 Oct 24 13:30 cs_comments_service/
drwxr-xr-x 69 fox admin 2208 Oct 24 13:30 devstack/
drwxr-xr-x 36 fox admin 1152 Oct 24 13:30 ecommerce/
drwxr-xr-x 26 fox admin 832 Oct 24 13:33 edx-analytics-pipeline/
drwxr-xr-x 25 fox admin 800 Oct 24 13:30 edx-e2e-tests/
drwxr-xr-x 26 fox admin 832 Oct 24 13:31 edx-notes-api/
drwxr-xr-x 61 fox admin 1952 Oct 24 13:33 edx-platform/
drwxr-xr-x 25 fox admin 800 Oct 24 13:33 frontend-app-course-authoring/
drwxr-xr-x 23 fox admin 736 Oct 24 13:33 frontend-app-gradebook/
drwxr-xr-x 25 fox admin 800 Oct 24 13:33 frontend-app-learning/
drwxr-xr-x 25 fox admin 800 Oct 24 13:33 frontend-app-library-authoring/
drwxr-xr-x 27 fox admin 864 Oct 24 13:33 frontend-app-program-console/
drwxr-xr-x 27 fox admin 864 Oct 24 13:33 frontend-app-publisher/
drwxr-xr-x 29 fox admin 928 Oct 24 13:33 registrar/
drwxr-xr-x 22 fox admin 704 Oct 24 13:33 xqueue
This allows the DevStack to act as one repository among the whole group. However, this may cause a problem if you weren’t expecting to create directories in your parent directory. So we recommend you create a project directory and then clone the DevStack there, so that you can keep your work area clean.

Each of the directories contains its own project. For example, edx-platform is the Studio and the Learning Management System (LMS). They share a lot of code and so work as one project together. In another example, cs_comments_service is the forum backend - it handles the course discussions. There is one directory, other than devstack which is a bit special, and that's edx-theme. This directory is where you'd place any themes you wish to install.
Each project runs in its own Docker container, orchestrated by Docker Compose. Docker Compose puts all of the DevStack containers together on a virtual network, with ports exposed to your machine. For instance, you can visit Studio by opening your browser and going to http://localhost:18010, or to http://localhost:18000 for the LMS. Note that the LMS takes considerably longer to start up, and may not be running for up to a minute after you start the Open edX DevStack.
One quirk here is that the LMS and the Studio each have their own docker container, but they both load their code from the edx-platform repository. Don't forget updating that Studio's code also updates the LMS.
For most of this article, we will focus on the LMS and Studio, as they are the most commonly worked on projects in the DevStack.

The majority of the work done on the DevStack involves edx-platform in some way - and thus the LMS and Studio containers are involved. If you switch branches, you must update your Python requirements and your database.
Let’s say you want to pull the latest changes from master. You go into the edx-platform repository and then pull:
$ git pull
From github.com:edx/edx-platform
* branch master -> FETCH_HEAD
Updating 6f69fd7dc2..8cef028429
Fast-forward
…
The updated code likely has changed the dependencies. Switch back to the devstack repository:
cd ../devstack
Then, enter the LMS.
make lms-shell
Once inside, we want to run:
paver install_prereqs
This will download and install all of the Python and Javascript libraries needed to run the LMS. After installing the dependencies, update the database:
paver update_db
Once the database is updated, start the process over again with Studio. Exit the shell with ctrl+D or:
exit
And then enter the Studio shell with:
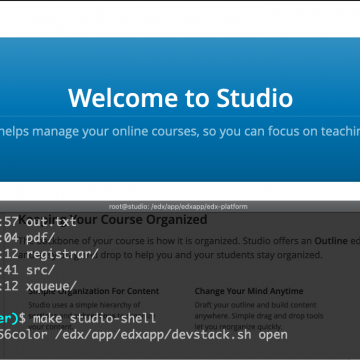
make studio-shell
You can then run the same paver commands as before. Your LMS and Studio should now be ready!
By default, Studio and LMS will automatically reload and handle any changes you make to their Python files within a few seconds. However, it does not automatically update Javascript and other frontend assets. Thankfully, there is a way to watch and automatically update those files just like the Python ones. We’ll use the LMS as the example. From the devstack directory:
make lms-shell
Once inside, run:
paver watch_assets

The frontend files will then be built and will watch for any changes, automatically rebuilding when they are found.
Any changes you make to the platform’s logic should always be verified with new tests. Likewise, you should run existing tests to verify you’ve not broken anything with your updates. To run unit tests, once more enter the shell of the system you wish to test from the devstack repository:
make lms-shell
To run every test imaginable (we don’t recommend this unless you have a lot of time on your hands):
paver test
If you wish to run all Python unit tests:
paver test_python
To run all Javascript tests:
paver test_js

To run specific Python unit tests:
paver test_system -s lms -t path/to/file
...where path/to/file is a path to a file or directory that contains tests you want to run. Note that you should use -s cms instead of -s lms for studio unit tests. Code that's in common between the two projects should be able to use either flag.

You may have noticed that the paver command is used to perform several actions. Well, we’ve only scratched the surface of what it can do. Most of the commands that we haven’t covered won’t be useful to the average developer, but may come in handy from time to time. You can get a full listing of all commands paver supports by running:
paver --help
One thing that paver does NOT do is run the Django shell for you. You are likely aware that the LMS and Studio are very complex Django projects. Django comes with a REPL that allows you to run code directly. This makes it easy to look up database information without using SQL, for instance. You can perform any number of tasks with the full power of a contextualized Python shell.
To run the LMS Django shell, from within the LMS container, run:
./manage.py lms shell
Keen eyes will notice that this is almost the normal Django shell command. However, for all management commands in edx-platform, you must specify either lms or cms, since they both initialize different environments.
In fact, many other Django management commands are available. Most of the useful ones are invoked by paver as required, but you can list them directly like so:
./manage.py lms
This will list all commands, which you can then investigate further. For instance, to get help for the migrate command, run:
./manage.py lms migrate --help
Getting oriented around the Open edX DevStack can be overwhelming at times, but with a handful of commands you can make your way around the project and contribute your own code to the Open edX platform.
Of course, if you like, you can always call upon us to assist you with Open edX projects. Come drop us a line and let us know what you’re interested in doing. We’ll let you know how we can help!